Welcome to the home of Rosaline.

WELCOME TO THE HOME OF ROSALINE!
Showing posts with label Creative Tip. Show all posts

April 15, 2011

Easter Flowers


I just absolutely love the creative spin on these Easter flowers.  It's so simple, yet striking enough to add enough colour and detail to your Easter table!

You can easily pull off the same idea by purchasing a few grass nests and adding moss, hollowed eggs and freshly picked garden flowers.

April 4, 2011

My Little Palace


I found this wonderful idea online and just had to share! I remember playing under and around the dining room table. Back then, we just used bed sheets and my brother and I had our own 'dens' to play from. 

These Table Cloth Houses are such a creative and fun spin on having your own den and I can just imagine how much fun it must be to have your own secret little house while the grown ups are eating.  You can make these yourself and even use an old table cloth to cut from. 

See the video clip below for instructions on how to make your own Table Cloth House!

March 29, 2011

Easter At Home

Easter is probably the prettiest holiday there is. I adore soft pastel colours and they are just so typical of Easter. In my family we usually decorate our homes with hints of Easter just as we do with Christmas. You don't have to spend a fortune - just look around in a few craft stores or even your own garden to gather a few Easter items and to get the spirit of Easter going in your own home. 

Here are just a few cute and easy images I found online. They are all easy to do yourself and will cost you next to nothing. 

Grass Nests and Felt Eggs

These small nests are available at any large florist or crafts outlet. They are so versatile and you can use them from underplates (as I've done in many of my events) or just as decor to add to a theme. Felt material is also available in various colours at most fabric stores. These tiny eggs aren't difficult to make. Just add a bit of moss or even a few leaves or twigs with a small name tag and you have created a place name tag for your Easter table or just a tiny piece of Easter decor. 

Easter Egg Trees

I absolutely love Easter Trees and you will not find my home without at least one during April! They are so easy to make. Scout around in your garden (especially now) for dried or dead branches. Place it in a ceramic pot or a pot of your choice and display on a table or server in one of your rooms. You can add various Easter decor items to the tree. I usually use Easter eggs that I've collected over the years, but you can even make your own Easter egg cut outs on beautiful scrapbook paper or even ask your children to paint a few hollowed eggs and use them on your tree. 

Hand Stitched Easter Eggs

These hand stitched eggs are just adorable and if you are skilled with a needle and thread, I'm sure this will be a piece of cake! They key is to use different materials and textures. As illustrated in the image, they've used lace, felt and other cotton materials. This creates a layered and interesting effect. You can buy polystyrene at most crafts outlets - they make the perfect inner to cover with your material with. 


Egg Stand Flowers

If you have a few egg stands and haven't used them in quite some time, now is the time to dust them off and put them to new use. These easy to make yourself flower arrangements will add just the right ambience to your home to welcome the Easter! You can either use coloured eggs to add to the height and colour as they've done in the image, or use them as they are and place a few freshly picked garden flowers in your egg stand. Group them together in uneven numbers and use them either on a side table in your living room or as small flower arrangements on your Easter table. 


Personalized Buckets and Baskets

We have an Easter egg hunt every year on Easter Sunday, no matter how old you are. It's so much fun and is just another family activity everyone can enjoy. These personalized buckets are such a cute way of adding to the Easter holiday spirit. You can either hand paint these or if this is too much trouble, why don't you add a large name tag to each basket? Add a few colourful ribbons too. These buckets are versatile and can be used after wards as ice buckets, knife and fork holders at a party or anything else you can think of! 


Grass Holders

Grass is so fitting to Easter and nowadays you don't only see them oustide your home anymore! People have used these as decor items inside for quite some time, and so can you! If you start growing your grass arrangements now, they will be ready just in time for Easter. They are easy to grow yourself and the seeds are available at any local nursery. If you don't have time to go to the extreme of nurturing a few grass arrangements, buy grass plants and plant them in the containers of your choice and use them as is. Add a few quirky Easter decor items or even a few chocolate Easter eggs will do just the trick!


Easter Goody Bags

These little goody bags are easy to make if you can gather a good dose of patience. They are pretty easy to make, but time consuming. All you will need for the project will be white paper bags, cellophane to cover the inside of the cut out area, a stencil, colourful ribbon and tasty goodies for your goody bag. Have a look online for cut outs or stencils. You can even look in some children's books - you might find beautiful images of rabbits or chicks to trace. 


Pastel Coloured Cookies

Try and add a bit of colour to your kitchen creations too this Easter and make colourful biscuits, cookies and cakes. A little bit of food colouring can add just the right touch to your favourite recipe. Place them on a tray or even in a little wicker basket and add to your Easter decor. If you aren't a big cook, look out for some crafty and colourful biscuits and confectionaries in your local deli or supermarket. 


Colourful Wreaths

Wreaths add such a warm feeling to any home. You can use them inside or outside your home, but the prefect spot would probably be right at your front door. Although the colourful wreath in the image is for the more skilled crafter, you can easily purchase wreath rings at large florist. Decorate them with a few hollow eggs, feathers or anything you might think will work. I've seen quite a few wreaths covered in only ribbon. Purchase satin (these will be the most pocket friendly) in 3 or 4 soft pastels colours and wrap them around the wreath until you have covered the entire wreath in ribbon. You can change and add your wreath each year for Christmas and Easter to match the season!

March 11, 2011

Candy Coated Wonderland

The Candy Shop

Popcorn Lolli Stands

 Lunch Bags and Name Tags

Candy Shop Jars 

Lollipop String

Guest Welcome Drink

I finished the Candy Coated Wonderland party over the weekend and although the weather didn't play along, the colours of the party certainly brightened things up! 

No candy party is complete without a candy shop. We created a candy shop for guests to take candy home in coloured bags. To add character to the candy shop, we designed and added food labels to the jars and tied them together with a few satin ribbons. And then off course, bunting flags.  I made use of a lot of the bunting flags - they added the perfect touch. 

Other decor items included a string of covered wooden lollipops and candy cane's at the entrance door. It set the mood as the guests walked in with their colourful welcome drinks.  Another item was the chinese lanterns. I used red, green and blue lanterns and they where hung above and around the kiddies table. And lastly, I made use of popcorn quite a bit. Popcorn can be made a several colours and they are an affordable way of adding 'candy' to the decor.  You can add them to centerpieces (as I did) or even put a few on a string to be hung from the ceiling for extra fun!


Candy Coated Storyboard

I am terrible excited about my new project. I am doing another birthday party pretty soon and just finished the storyboard and presentation thereof. The theme will be a Candy Coated Wonderland for a birthday party of a 1year old boy. We decided on a colour palette of aqua blue, green's and red as the main colours. 

Once again, I will post my progress on the event as I go along to help you with your own Candy Coated birthday party planning.  

Lollipop Invitations

The invitations were sent out and I took some cute photo's of the boy wearing an oversized bow tie and a colourful candy cane lollie. The invitations were made up as lollipops on wooden sticks to keep it fun, playful and theme fitting. He had so much fun and the bow tie didn't bother him one bit! Such a good poser.  

March 9, 2011

Paris Chic Bridal Shower


I recently had a request to post some tips and ideas on bridal showers. I found this lovely Paris inspired Bridal Shower online and thought I'll share it with you. 

This type of set up is pretty easy to do with enough planning. Once again, you need to stick to your colour theme and choose 3 main colours and build your event decor on that. They chose a sophisticated colour palette of lavender, black and white and used different shades of lavender here and there to give it a bit of depth. You will be amazed at how many different types of decor items you will be able to find in different shades and different textures of your specific colour. They incorporated lace, polka dots, stripes and doilies to give the overall theme a bit of texture. 

The use of the hatboxes as treat trays is such a clever way of incorporating the Paris theme.  Should you not be able to find boxes in the colour you need, you can always recover them with gift paper or even paint them. Use ribbon and scrapbook embellishments to decorate them and give them extra sparkle. 

I particularly like the vintage dresser as the cake table. Using various smaller cakes instead of one large cake is such a interesting way of adding to your food decor. As you will see in the image they used the cakes to further add to the theme and each cake had a unique themed look. The big pink garter cake is my absolute favourite!

To add to the soft and lacy Parisian theme, use a lot of ribbon. Use it around your cake stands, on the chairs or even tie the knives and forks together to add to the food table display. You can buy beautiful satin ribbon at almost any Metro or fabric shop - they are usually cheaper at fabric stores than anywhere else. 

Lastly, event stationary. People always tend to forget to add a few personal touches here and there, but it gives your event a classy touch. Take some time and cut out a few handwritten notes or even print out a few Eiffel Towers and a few printed notes. This usually takes up a lot of time, but get all the bridesmaids together and make it a team effort. Visit your local scrapbook shop and look around at what they've got. Various scrapbook shops offer ready cut-outs in various shapes and sizes - you might even be able to pull it off and look like a professional! 


February 22, 2011

Earn Your Stripes


If you are tired of an old boring plain coloured wall, try painting a few stripes on to spice up your entire room. Stripes add a fun and modern element to any room and you can mix almost any colour to create an interesting focus wall.  From the images you will see that you can use narrow or wide stripes or a combination of the two. You can paint vertical stripes to add volume to your room or horizontal stripes to add length. Although the images only show two colours, you can use various colours to make a bold statement.

Stripes are pretty simple to paint and are much less work than you might think. The best is to start off and cover the entire wall with one colour. Decide on the width of your stripes and make small markings on the entire wall. Tape your masking tape to the wall and ensure with a spirit level that all your stripes are straight. You've now covered most of the hard work. Start painting the contrasting colour or colours within the marked area and wait until the paint is completely dry before removing the tape. Removing the tape can be quite tricky and you need to exercise quite a bit of patience as a small tug can peel off the paint. Starting from the one end slowly pull the tape off and work your way to the other end. You have now successfully earned your stripes!

I've included a quick video as an illustration!

February 16, 2011

Stencil Chic


Every so often I find a creative and stunning idea or project that is so relatable and easy to do. These fantastic stencil mirrors just happen to be one of them! 

I found this awesome idea on the ELLE Decorations website and what makes it even more exciting is that the stencils were included in the original article. I have added them at the bottom of the article for you to download. 

This project doesn't take much and is quite cost effective. You can easily spice up your bathroom cabinet and add a fresh look to that old boring wall! You can even do the same above your dresser - it will be just as effective!

There are two different ways to do stencils, but I personally choose to paint onto a wall instead of using stencil paper. Firstly, download the stencils and print them out to size. You can change the size according to your specific need. Once printed, cut the stencils out and trace these onto the wall. Use very light markings as the markings are sometimes difficult to get rid of. Once you've chosen your colour of paint, use a very thin artist brush and start colouring in working very carefully and neatly! Lastly, choose 3 types of similar looking mirrors, and hang them onto the stenciled mirror! 

Click Below To Download:


February 12, 2011

Love Tea Time


Wake up your loved one on Valentine's day with a warm cup of tea and a handwritten tea-bag tag.

Cut two hearts out of red paper and use a white or metallic pen to write your message on your heart . Remove the tea-bag tag and at the end of the string, attach the two hearts, back-to-back, using a stapler. Add your hot boiling water and serve with love!

February 8, 2011

Photo Booth Props


Photo booths are the perfect tool for adding spontaneity to your pictures and encourage guests to have loads of fun while taking photos.  

I recently suggested to one of my clients that we do a photo booth at their wedding. Because the photo booth costs did not fit in to their budget, it was my job to come up with another creative idea that would fit into the budget.

You can do the same at your next party or celebration:

Have a cordoned off area that will be for the photo booth only. You will need a fun back drop for your 'booth'. Select the type of style you want the photo's to be taken in - retro, funky or formal. Ask one of your friends with a nifty camera to take the photo's in the photo booth. Have the camera set up and ready on a tripod to ensure that all your 'photo booth' photo's will be from the exact same angle.  Create time slots in which the booth will be open for photos and invite your guests to partake during these time slots. The key to your booth will be fun props. I had awesome wooden props made and there will be enough props to make each photo unique and fun. 

February 5, 2011

Very Vegas


A friend of mine asked me to help her out with a few dress up ideas for a Vegas bachelorette party she's attending this weekend. 

I've never been to a Vegas party, but this being a bachelorette party I can just imagine all the girls dressed up and looking so glamorous. We came up with an idea of a plain little black dress and something big for her hair to bring in the Vegas theme. The idea came about and I made her a hairband out of poker chips. It worked very well and there's no way she won't look like she's at a Vegas party!

You can easily make this at home for your next Vegas party or just a dress up party. You can use the same tips for any themed party - keep your outfit simple and just add something spectacular to your hair. 

For this hairband, you will need:
- 15cm of Felt 
- Black Net
- Polka Dot Ribbon
- 9 Poker chips 
- Diamante's 
- Hairband 
- Glue gun

Start off by cutting a circle out of the felt material to use as the backing. The felt backing will give the poker chips support and will hold up the entire structure. Then, cut the net into petal like shapes and glue them onto the felt piece by piece. Try and overlap most of them to add some depth.


Glue the polka dot ribbon onto the edges of the felt to cover it up. You have now created a perfect border for the poker chip flower. Start by gluing the first few poker chips as the base. 5 Poker chips will create a perfect circle.


Once they've dried, glue 3 chips on top of the bottom chips. Leave them to dry.  Glue the last remaining poker chip in the centre to cover the hole and to complete your 'poker chip flower'.


Finally, secure the hairband with another rectangular piece of felt onto the felt backing.  Ensure that it is glued properly. Lastly, glue the diamante's onto the net to give it a bit of shimmer and that touch of glamour!


February 2, 2011

Do It Yourself Headboard


You can easily make this 'shabby chic' headboard yourself. 

To create this look, take a few pieces of old wood and nail them together. If you have to buy new wood, sand your wood roughly to even the surface. This will prevent your clothes and other material from tearing when leaning against the board. 

Paint the wood with a few brushes of paint here and there to give it some character and to give it that 'shabby' look. Bare in mind that the more distressed, the better for a look like this. Once you have your panel of wooden slats, paint your message of choice on and set it against your bed.  

Sleep tight!

January 28, 2011

A Subtle Message


I love these wooden word blocks! They are so much fun and make a perfect and unusual gift for anyone. You can use them in the kitchen, study, bedroom or even on the Christmas, Valentine's, Easter or Halloween table as part of the decoration. What's even better is that they are proudly South African. 

These are just a few of the hundreds of phrases available:

EK ♥ LABRADORS, MAN OF THE HOUSE, LOVE ME TENDER, SPEK & EIERS ASB, KISS, LAUGH, LET THEM EAT CAKE!, HOME SWEET HOME, LOVE, BON VOYAGE, TIME FLIES, SMELL THE RAIN, PARTY TIME, STOUTE KABOUTER, PEEK A BOO!, EMPTY NEST BLISS, ELLE MAGAZINE, GARDEN & HOME, VIVA SUID-AFRIKA

I have a few of these in stock. Let me know if you would like to place an order. 


January 27, 2011

Artwork Without the Artwork


As trends and styles change, so do our walls. It's time to dust off those old frames and put them to new use. 

I've illustrated above how you can re-use your empty frames and frankly, it won't cost you a thing. I  especially like these rustic wooden frames. You can find them literally anywhere, but I suggest you have a look at Bellbottoms in Villieria, Pierneef Street. They recycle old wooden skirtings, so I suppose there's a bit of vintage in these frames. 

Some creative ideas include displaying your empty frames on a shelve, table or chest of drawers. Spread them out and put one in front of the other to create a bit of depth. It's an artwork without the artwork. Another idea is to paint the backboard of the frame with black chalk paint. These come in a 1 litre tin and you should be able to find them at your local hardware store. Another great idea is to cover the backboard with very thin foam and a small piece of material. Use this as a pinboard for your photo's, memo's or any memorabilia. And lastly, tie wire at each opposite end of your frame and use a peg to display your birthday cards or even your favourite photos.

January 26, 2011

There's Light At The End Of The Teapot


How fun are these teapot chandeliers? These must look absolutely stunning over a kitchen island or your breakfast table!

I am sure you can do the same with a teacup and saucer - three or four grouped together will have just as much impact as these teapots!

January 25, 2011

The Bunny Hop


Main Table

Table Settings

Food Lollipops

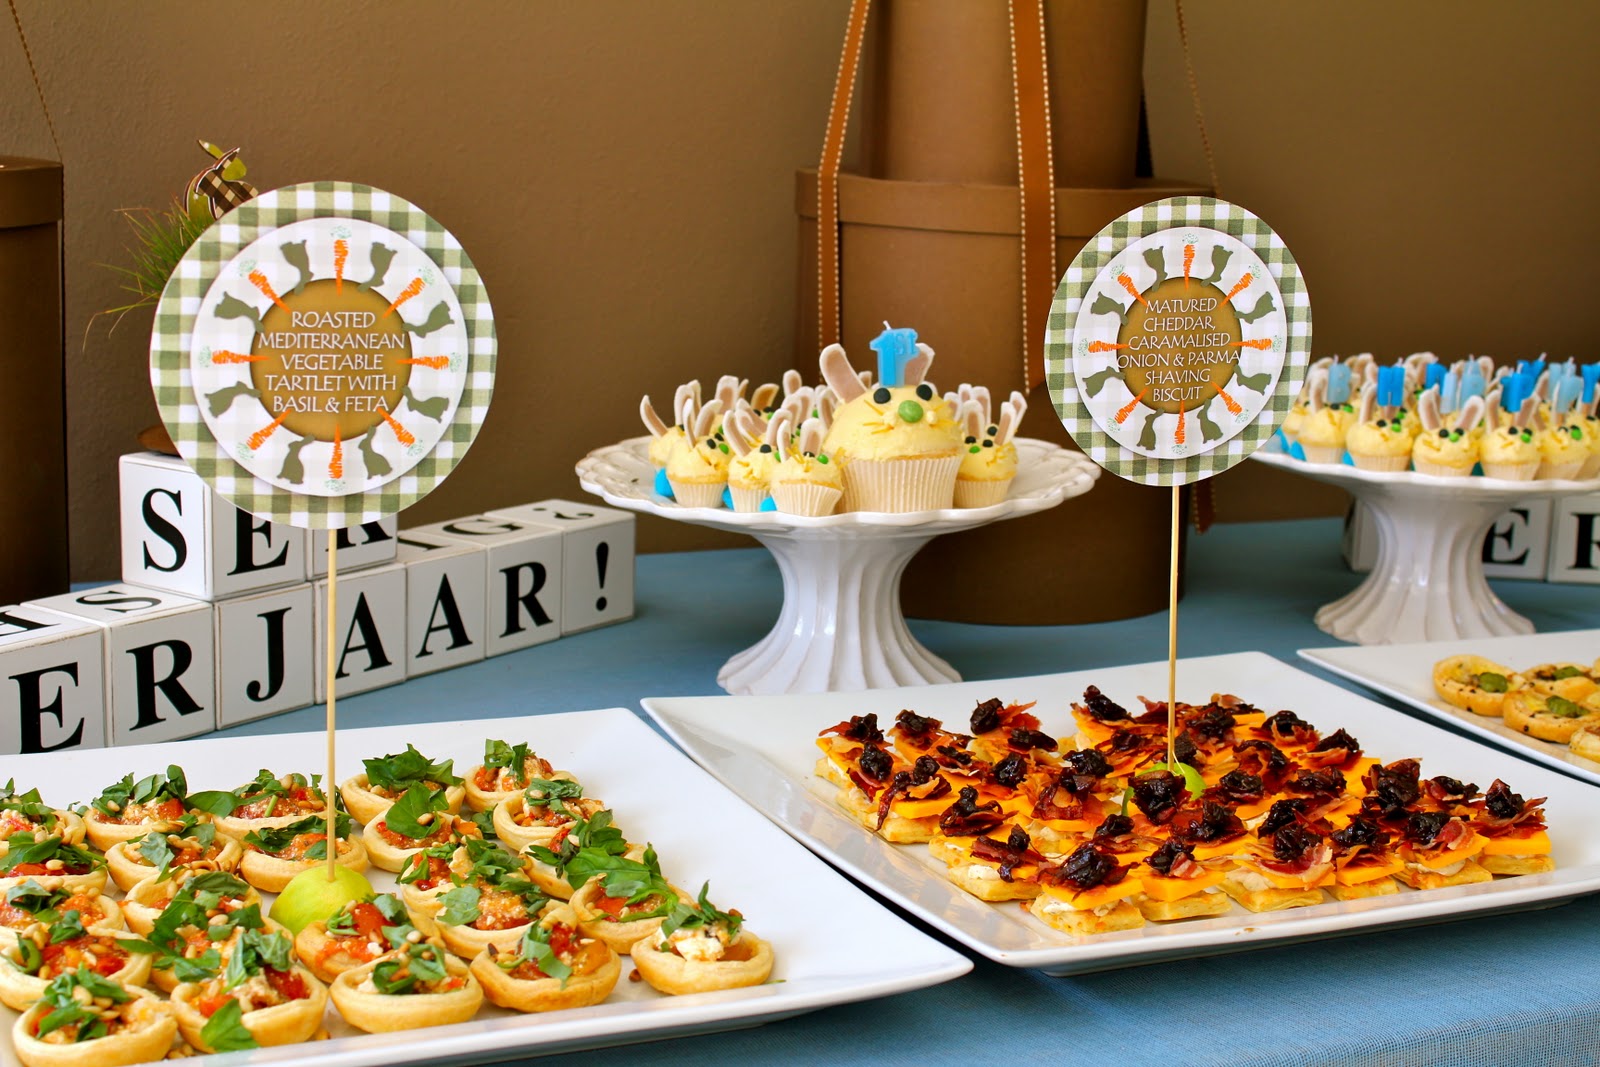
No 1 Gift Box Tower & Ek Verjaar Blocks

Food Table (Side View)

Kids Table Setting

Bunny Birthday Cupcake and Bunny Friends

T-Shirt with Custom Bunny and Birthday Phrase

And so the bunny finally hopped! I finished the bunny themed birthday party today and it was such a fun theme to work with! I've added a few photos of the final product. 


The Bunny Hop Storyboard

One of my readers sent in a request for party ideas for small children. I thought it would be a great idea to do regular updates as I make progress with an event and hopefully give you some inspirational ideas and tips for your own event.

I am busy planning an event for a one year old boy. The theme is bunnies and I just finished my storyboard. Using a storyboard to present all the ideas really helps the client to envision what you are proposing and helps you to focus on the core items of the event.

As I go along, I will post updates under the label 'Bunny Hop Event Progress' so that you can easily follow the progress and hopefully see the end result. 

Invitation (front)

When it came to the design of the invitations, it was important to incorporate elements of the party as much as possible. I photographed the little boy a while back and we used the images on his invitation. He was such a good bunny! To bring in elements that will be used at the party, the table cloth material was scanned in and used as part of the design.